
A striking office logo can look wrong if it’s designed for the artwork file rather than the room. A custom 3d logo for office wall needs to work at its chosen size, suit the wall and interior, and remain clear from the places people will view it. If you’re weighing up flat-cut, built-up, acrylic or illuminated lettering, start by considering the effect you want and the conditions in the room.
This guide explains how to plan a distinctive 3D logo for a reception, meeting room or office, and choose a construction and finish that fit your brand and space. You’ll also learn what to consider about position, viewing distance and surrounding décor before production begins.
First Stop Signs Print brings design, fabrication and installation together at its Romford workshop. Every custom order includes a free digital proof at actual scale, with unlimited revisions before production sign-off, so you can review the proposed design before it’s made. The guidance below covers proofing, material choices and professional installation across Greater London, Essex and the Home Counties.
Key Takeaways
- Plan your custom 3d logo for office wall around the room, brand identity and viewing distance, not just the logo artwork.
- Compare flat-cut letters, which are 10-20 mm thick, with built-up letters, which have 30-80 mm depth, to choose the visual impact that suits your space.
- Use wall size, colour contrast, desired depth and lighting preference to guide your design choices.
- Consider how the logo will sit alongside the room’s finishes and furnishings to create a polished, cohesive focal point.
- Follow a clear process from artwork and placement planning through proof approval, production and installation.
Why choose a custom 3D logo for an office wall?
A custom 3D office logo is dimensional branded lettering or artwork designed for a particular wall and shaped around the organisation’s identity. Its size, layout and finish can be planned for the space, rather than adapted from a standard sign. The result is a clear visual marker that helps a reception, meeting room or shared workspace feel recognisably connected to the brand.
Unlike a poster or a small logo on a desk, a wall-mounted feature becomes part of the room. It gives visitors a consistent point of reference as they move through the workplace and gives employees a visible expression of the organisation they work for. A well-positioned logo can also provide a considered backdrop for client meetings or team photographs without dominating the interior.
Clear, well-placed office branding helps make the visitor experience feel consistent from the entrance to the meeting room. Plan the identity and the room together: consider the logo’s proportions, the wall’s usable space and the routes people take through the office. For broader context on marks and their development, explore this overview of the logo design process.
Where an office wall logo can make the strongest impression
A reception wall is often the first natural brand touchpoint for visitors and prospective clients. In a meeting room or collaborative area, a logo can bring a shared space back to the organisation’s identity, even when the room is used by different teams. Before settling on a position, check sightlines from the entrance, seated positions and common photography angles. A placement that looks balanced head-on may be partly hidden from a doorway or table.
What makes a 3D logo different from flat wall graphics?
A flat printed graphic sits visually close to the wall. Dimensional lettering or artwork projects from it, creating visible edges and shadows that change with the viewing angle and the room’s light. The effect isn’t determined by depth alone: the design, mounting position, lighting and surrounding wall all influence how clearly the logo reads. A detailed mark may need a different treatment from simple lettering to keep its shape legible.
Think about the wall as part of the design. A textured or strongly coloured surface can affect contrast, while nearby furniture and fittings may compete for attention. Considering these details early helps the sign feel integrated rather than added as an afterthought. For more on construction options and how dimensional lettering is made, see the complete guide to 3D lettering.
That room-first approach makes a custom 3d logo for office wall distinctive: the artwork is considered alongside its setting, audience and purpose. It can become a lasting branded feature, while posters and desk-level identity pieces are easier to move or replace. The next step is choosing a construction that delivers the right depth and visual presence for the space.
How are custom 3D office logos designed and constructed?
Construction determines how far the logo stands proud of the wall, how its edges appear and whether lighting can form part of the design. Flat-cut and built-up letters create distinct effects, but neither is automatically the better choice. Let the artwork, viewing distance and character of the office guide the decision. A slim, understated mark may suit one reception, while a deeper profile may better express another brand.
Flat-cut or built-up letters: what changes?
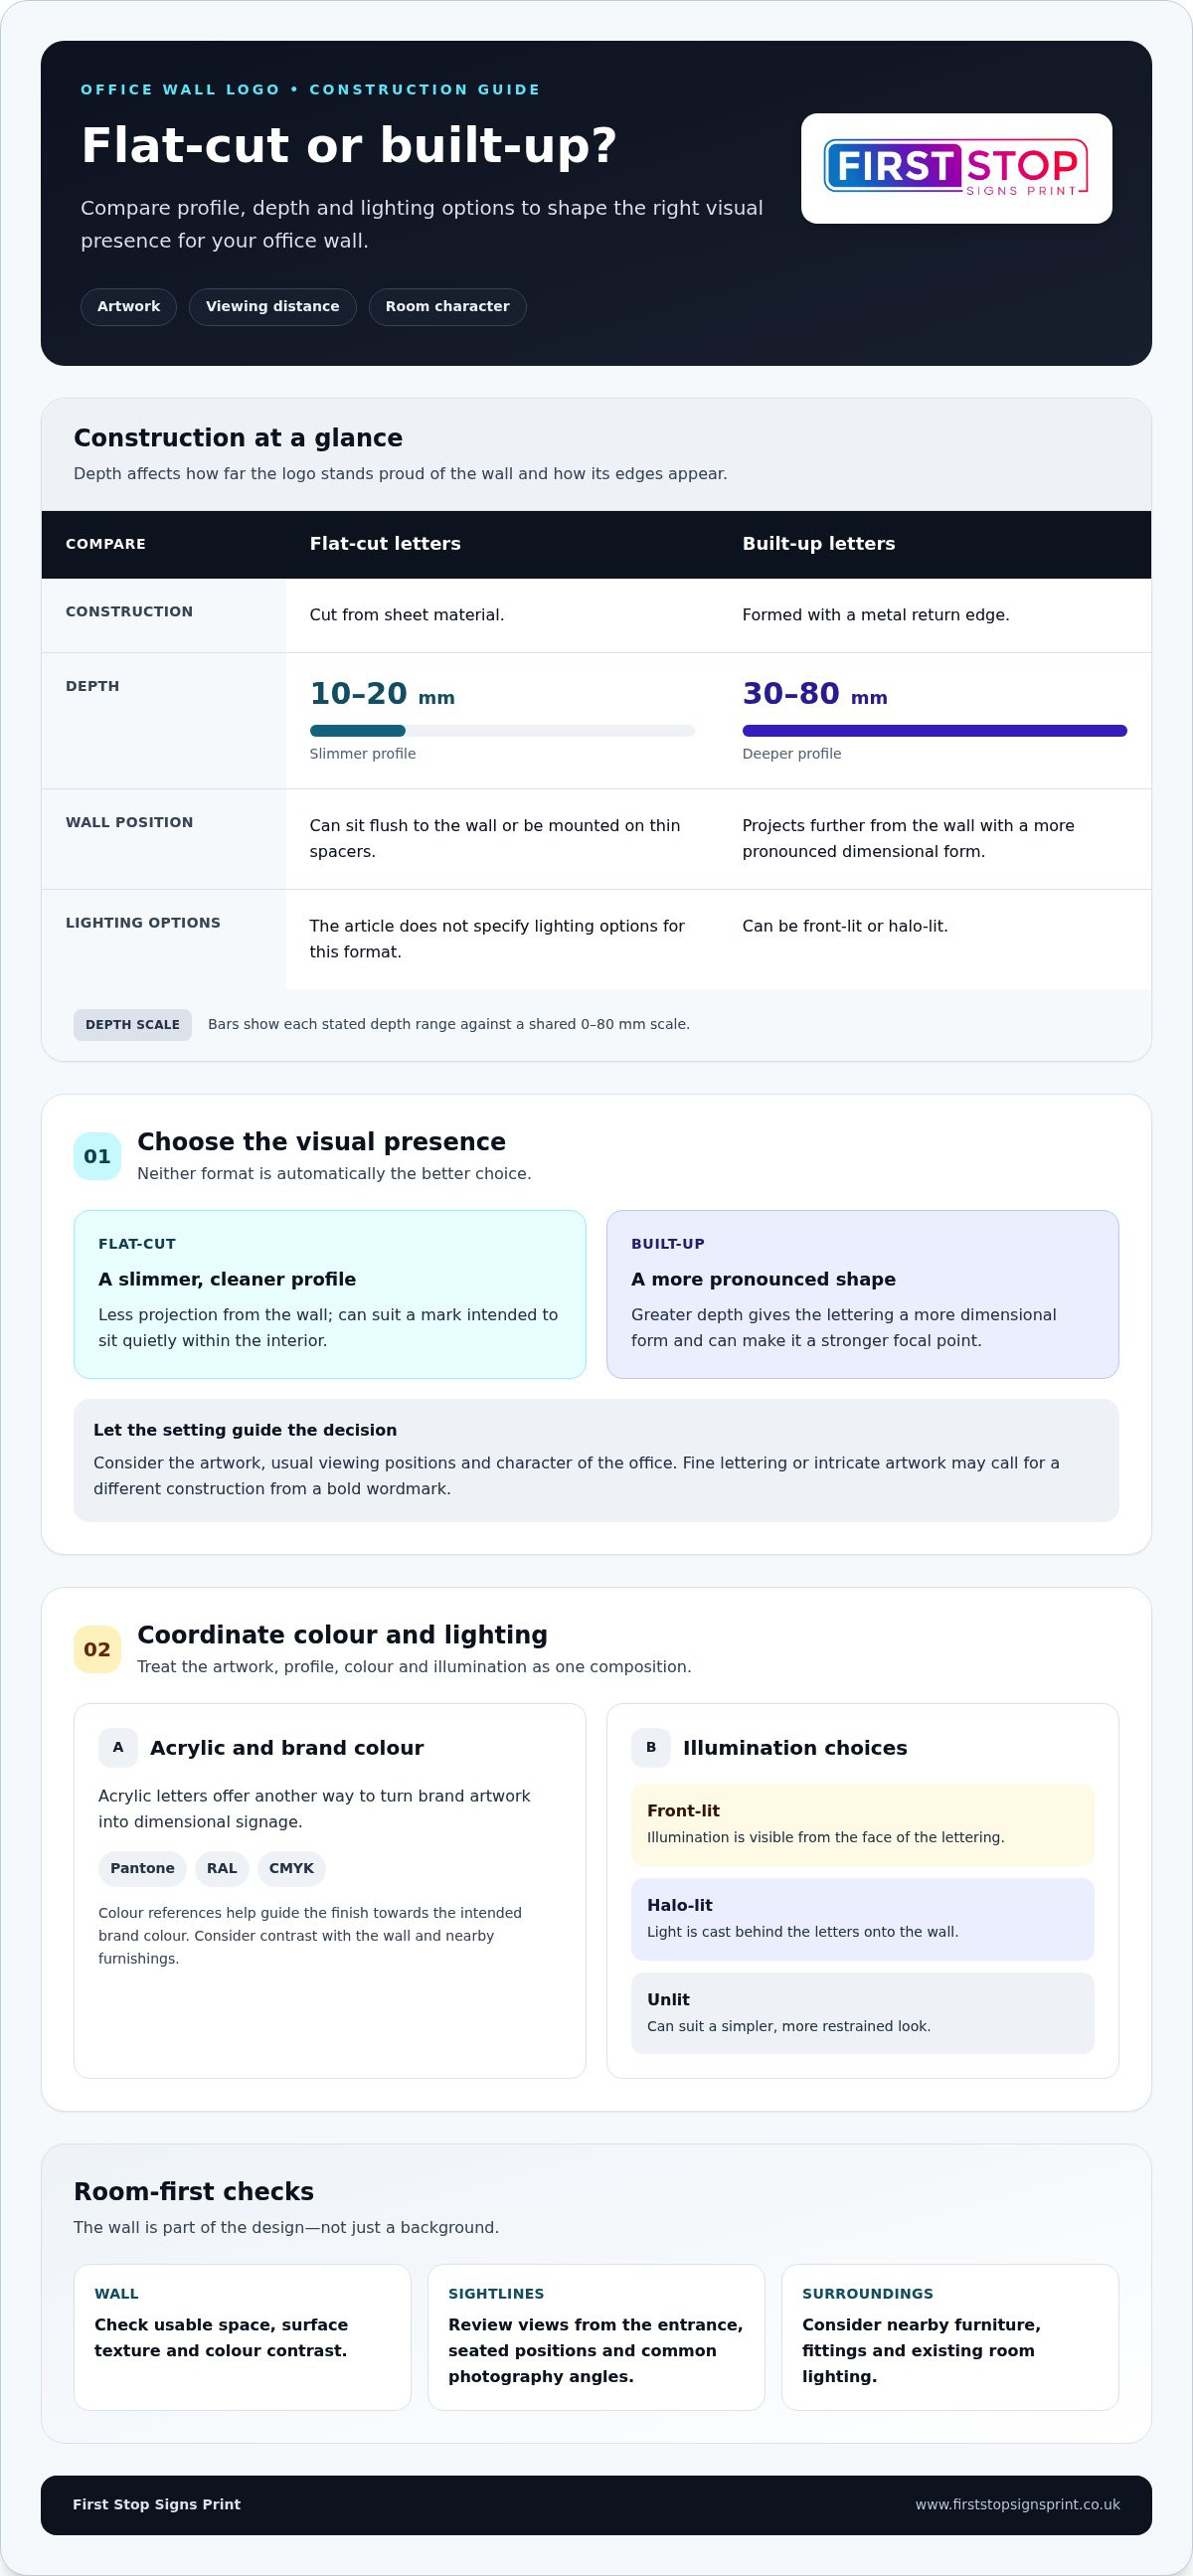
Flat-cut letters are shaped from sheet material and have a slimmer profile, typically 10-20 mm thick. They can sit flush to the wall or be mounted on thin spacers. Built-up letters have a three-dimensional body, with a metal return edge and a depth of 30-80 mm. That deeper profile gives the lettering a more pronounced form; built-up letters can also be front-lit or halo-lit.
| Format | Construction and depth | Visual effect |
|---|---|---|
| Flat-cut letters | Cut from sheet material; 10-20 mm thick; mounted flush or on thin spacers | A slimmer, cleaner profile with less projection from the wall |
| Built-up letters | Formed with a metal return edge; 30-80 mm deep | A more pronounced dimensional shape, with front-lit or halo-lit options |
Use the comparison as a starting point, not a fixed rule. Fine lettering or intricate artwork may call for a different construction from a bold wordmark. Decide whether you want the logo to sit quietly within the interior or become a stronger focal point, then consider how its depth will look from the usual viewing positions.
Acrylic, colour and illumination choices
Acrylic letters offer another way to translate brand artwork into dimensional signage. Colour references such as Pantone, RAL or CMYK help guide the finish towards the intended brand colour. Share the relevant reference with your artwork, then consider how that colour will contrast with the wall and nearby furnishings.
Lighting changes the character of the sign. With front-lit lettering, illumination is visible from the face; halo-lit lettering casts light behind the letters onto the wall. The right effect depends on the design and setting, including the wall surface and existing room lighting. An unlit finish may suit a brief that calls for a simpler, more restrained look.
For a custom 3d logo for office wall, judge the artwork, profile, colour and lighting as one composition. First Stop Signs Print creates bespoke 3D signs and letters. Explore custom 3D signage options as you consider the right format for your office.
Will a 3D office logo suit your space, brand and budget?
A 3D logo can work in different office settings when its scale, contrast and construction suit the room. Choose a format that fits the available wall, reads clearly from the main viewing points and sits comfortably alongside the interior. A large, deep sign may overwhelm a compact room, while a small, low-contrast design can lose definition on a broad wall.
Use this decision matrix to turn the room’s conditions into practical design choices. Treat it as a starting point: the artwork and desired appearance still shape the final specification.
| Consider | What to assess | How it informs the design |
|---|---|---|
| Wall size | Usable width and height, allowing for furniture and fittings | Helps set the logo’s overall scale and position |
| Viewing distance | How far away people stand or sit, and their approach to the wall | Guides the layout and legibility of lettering |
| Brand colours | Logo artwork and documented colour references | Supports a finish that fits your visual identity |
| Desired depth | Whether you want a subtle profile or a more prominent form | Helps determine the construction |
| Lighting preference | Existing room light and whether illumination is wanted | Influences how colour, shadows and depth appear |
Check the wall, viewing distance and visual balance
Measure the usable wall width and height, excluding areas taken up by doors, screens, shelving or furniture. Then check the logo’s likely position from the room’s main approach and key viewing points, including seated areas. The layout should remain legible without crowding nearby features. Note the wall finish and existing brand elements too, so the sign complements rather than competes with them.
Light changes what you see. Natural daylight can shift across the wall during the day, while ceiling lights and other fittings may cast shadows or alter the appearance of colours. A dimensional letter can look more pronounced under some lighting angles than others. Consider the room in its usual working conditions, not just in a single photograph.
Match the finish to brand guidelines
Provide current logo artwork and documented brand colour references, such as Pantone, RAL or CMYK values. These give the design process clear direction, while the approved proof is the visual sign-off point before production. First Stop Signs Print supplies a free digital proof at actual scale, with unlimited revisions before sign-off, so you can review the proposed size, placement and finish before approving it.
For a custom 3d logo for office wall, prioritise the choices that matter most to the room and identity. A restrained design with strong contrast may serve the space better than added depth or lighting. In another setting, a more pronounced build could be the right fit. Set your priorities clearly, then review them together in the proof.
How should you plan the design, placement and installation?
A clear plan takes the logo from an idea to a finished wall feature with fewer surprises. Start with the exact wall and artwork, then work through the proof, production approval and installation arrangements in order. This keeps layout and position decisions connected to the real office, rather than leaving them until the sign is ready to fit.
- Define the wall and purpose. Record the wall’s usable area, the room’s main approach and the positions from which people will view the logo. Note nearby furniture, doors, screens and other features that may affect placement.
- Prepare the artwork. Gather the current logo files and brand colour references. Vector artwork is preferred in AI, EPS, SVG or PDF format, with fonts outlined where available. Raster artwork is accepted at 300 dpi.
- Review the digital proof. First Stop Signs Print provides a free digital proof at actual scale, with unlimited revisions before sign-off. Check the layout, colour, proportions and spelling, and consider how the proposed position relates to the wall and room.
- Approve production. Sign off the proof when the artwork and proposed appearance are right. Approval marks the move from design review to production.
- Arrange installation. Identify the exact wall, access route and preferred viewing direction so the installation can be planned around the site.
Prepare artwork and approve the digital proof
Good source artwork helps retain the intended shapes and proportions. If you have several versions of a logo, use the current approved file and include relevant colour references. On the actual-scale proof, inspect the whole composition as well as the details: check spacing between letters, alignment, colour balance, spelling and how the sign sits within the available wall area. Request revisions before sign-off if anything needs adjusting.
When reviewing the layout, consider readability and visual hierarchy as well as the logo itself. A clear visual order helps the main brand mark stand out, while the wall and nearby features remain part of the overall composition.
Plan the wall and installation details
Be precise about the wall location and how the sign will be approached and viewed. An entrance-facing logo may need a different position from one intended to be seen across a meeting table. First Stop Signs Print provides professional installation across Greater London, Essex and the Home Counties. Every installation carries a 2-year warranty.
With design, fabrication and installation managed through First Stop Signs Print’s Romford workshop, the stages connect from proof to fitting. Discuss your office wall logo project and share the artwork and site details to begin planning.
Romford workshop to finished office logo: what to expect
A bespoke office logo involves more than producing the lettering. The design needs to suit the wall, the construction must match the approved artwork, and installation should place the finished sign where it can be seen to best effect. First Stop Signs Print manages design, fabrication and installation through its Romford workshop, creating a joined-up process from initial brief to fitted logo.
A joined-up design and production process
It starts with your project details and logo artwork. These help shape the proposed layout, dimensions, construction and finish. Before production begins, you receive a free digital proof at actual scale. Review it in context: check the proportions, spacing, colour and intended position, and request any changes before approving it. Unlimited revisions are available before sign-off, giving you the chance to refine the proposal before fabrication.
Once you approve the proof, the design moves into production. Keeping design and fabrication in-house connects the approved artwork with the sign being made. The final stage is installation, planned around the agreed wall location and viewing direction. Professional installation is available across Greater London, Essex and the Home Counties. Every installation carries a 2-year warranty.
Standard turnaround is 5-10 working days after design-proof approval, with an express service of 24-48 hours available for a surcharge. The process moves through proofing, sign-off, fabrication and installation, so include time to review the proof and request any revisions before production begins.
Request a quote for your office wall logo
A useful enquiry gives the team enough context to understand what you’re planning. Include the office location, the wall’s approximate usable width and height, and where the logo should sit. Add your current artwork and any brand colour references, then describe the look you’re aiming for, such as a slim profile, more pronounced depth or illuminated lettering. A photograph of the wall can show its finish, nearby furniture and available space.
These details help frame the design conversation and the work involved. You don’t need to have every choice settled; identify what matters most, then use the proofing stage to review the proposed appearance before production sign-off.
For a custom 3d logo for office wall, start with the artwork, wall details and visual effect you want to achieve. Discuss your office wall logo project with First Stop Signs Print and share the details that will help shape your bespoke sign.
Shape your office wall around your brand
Start with one practical step: decide what you want the wall to communicate and who should notice it. A welcoming reception, a confident meeting-room backdrop and a clear shared-space identity each call for a slightly different emphasis. Write down the impression you want visitors and colleagues to take away, then consider how the logo can support it without competing with the room.
For a custom 3d logo for office wall, a photograph of the space and a few notes on its purpose can make the first design conversation more focused. Include the wall location, approximate available area and any visual details you want the sign to work alongside. You don’t need every choice settled before taking the next step.
Bring your ideas together and request a no-obligation quote for your office wall logo. A considered starting point can help turn an unused wall into a distinctive, brand-led feature. Your next step is to share the artwork and wall details with First Stop Signs Print.
Frequently Asked Questions
Can First Stop Signs Print recreate an existing company logo as a 3D office wall sign?
Yes. First Stop Signs Print can recreate existing logos, including franchise branding, using supplied materials, colours, illumination type and mounting method. Send the current artwork alongside any brand guide or reference photographs, particularly if the logo needs to look consistent across several offices. The proof lets you review how the mark is adapted for your wall. Check distinctive details such as spacing and proportions before approving production.
What artwork file should I send for a custom 3D office logo?
Vector artwork is preferred in AI, EPS, SVG or PDF format, with fonts outlined where available. Raster files are also accepted at 300 dpi. If your organisation has a brand guide, include the relevant Pantone, RAL or CMYK colour references. For a custom 3D logo for office wall, sending the current approved artwork helps avoid using an outdated logo version or incorrect colour variation.
Can the colour of my office logo be matched to our brand guidelines?
Yes. Pantone, RAL or CMYK references can guide the colour matching. Send the values from your brand guidelines with the artwork, then review the proposed finish in the digital proof before sign-off. If the logo will sit beside painted walls, furniture or other branded elements, consider those colours too. This helps you judge the design as part of the office, rather than against a blank background.
Do I get to approve the office logo design before it is made?
Yes. Every custom order includes a free digital proof at actual scale, with unlimited revisions before production sign-off. Check spelling, layout, proportions and colour treatment, and compare the design with the wall where it will be installed. For example, confirm that a long company name is balanced within the available space. Production begins after approval, so give final sign-off only when the proof reflects the agreed design.
How long does a custom 3D office logo take to produce?
Standard turnaround is 5-10 working days after design-proof approval. An express service of 24-48 hours is available for a surcharge. The turnaround starts once you approve the proof, so allow time to review the design and request any revisions before sign-off. Production and installation are separate stages, so include both when planning around an office opening or refurbishment.
Where does First Stop Signs Print install office wall logos?
Professional installation is available across Greater London, Essex and the Home Counties, with design and fabrication carried out at the Romford workshop. UK-wide delivery is also available. Share the office location and whether you need installation when making an enquiry, so the project can be planned accordingly.


